
Chinese Roast Pork Recipe
First content post! This is my all-time favourite recipe. It has made an appearance every time I have to host a dinner. It is simple to make and never fails to impress.
May I present to you….
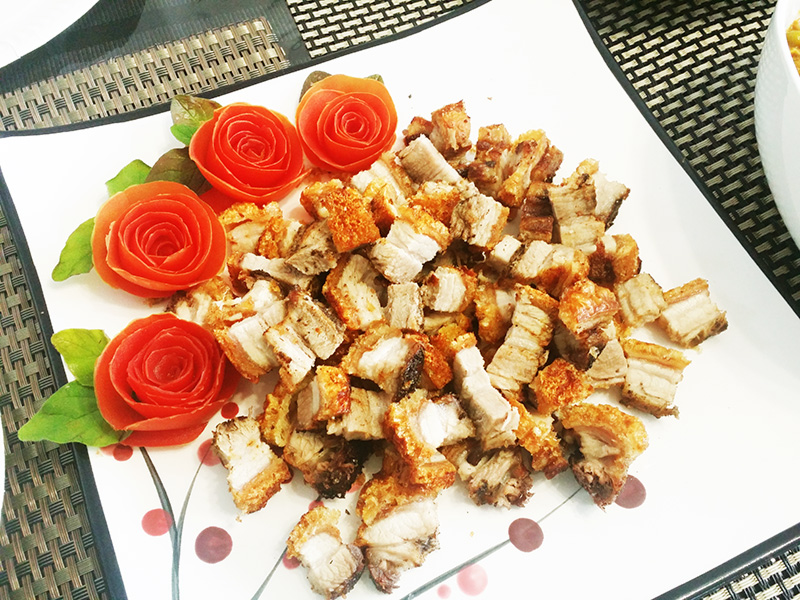
Chinese Roast Pork – it is also known as Siu yoke (Cantonese) or Sio Bak (Hokkien). This recipe is a result of my trial and error. Feel free to add your own flavour to it though.
Below is the recipe. I have included some tips in it to ensure you get the best crackling with moist meat.
- 500gm Pork Belly (or whatever you require, this amount fed a group of 10 but I also had 8 other dishes)
- 5 tsp Salt + ( you will also need a liberal amount later for the crackling)
- 1 tsp Pepper
- 5 tbsp Chinese Five Spice Powder
- You need a nice slab of pork belly. Try to get one that is thick and flat.
- After you have cleaned it parboil until you see scum floating around. Remove and wash under cold water. Scrape lightly across the skin with a knife to remove any imperfections. If there is lots of hair on it at this point, pluck it off.
- Dry it thoroughly and place it on a plate.
- After that, use a toothpick (or anything similar) to prick all over the skin. The more pricks the better. The idea is to get as many tiny holes as possible all over the surface of the skin.
- Once you have poked the holes, put it in the fridge for at least 2 hours. The longer the better. Make sure it is UNCOVERED! I know that this is not the most hygienic but it is essential as this properly dries the skin out.
- After the 2 hours (or overnight), remove from fridge and dab dry again. Preheat the oven to 180°C.
- Turn it over and rub a mixture of 5 spice powder, 0.5tsp salt and pepper on the meat side of the pork belly. Try not to get it on the skin.
- Line the roasting dish/pan with aluminum foil.
- Set the slab skin side up in the roasting dish/pan. Prick more holes for good measure.
- Now add a THICK layer of salt on the skin. Make sure to cover every inch of it. Don’t worry, you will scrape this off later.
- Gather the aluminum foil that you lined the pan around the slab of pork, so that it wraps around the meat without covering the skin.
- Chuck it in the oven.
- After 30 minutes, the layer of salt should have hardened. Tap it lightly with a spoon to check. You will notice the difference. If it isn’t, come back in another 10 minutes or so. When you feel that it is hardened, remove from the oven and scrape the layer of salt off. Remove as well as possible so that there is nothing on the skin. Once this is done, return to the oven.
- Check on it frequently from this point on. Once it starts to ‘bubble’, turn it to grill (top element only) and increase temperature to 200°C. Do not leave the oven at this point.
- You will see the skin start to ‘bubble’ very quickly and once there is an even layer of bubbles and has turned a nice shade of golden brown, it is ready! Doesn’t matter if it chars at some places, just serrate it off later.
- Remove from oven, let it cool, chop and serve immediately.
Phew, that is a long recipe but it is totally worth it! Serve it with rice or whatever you want really. Any leftover is excellent as well. Granted the crackling will no longer be as crispy but the flavour deepens and tastes great. I tend to make fried rice with it the next day  .
.
Let me know how you go!