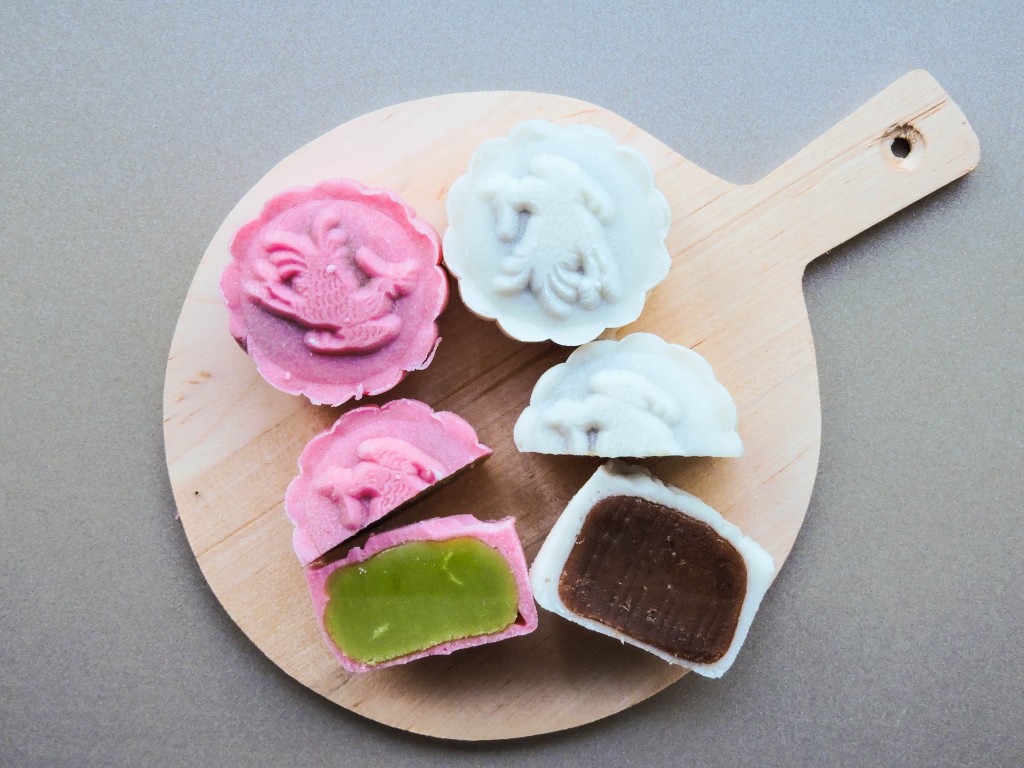
Snowskin Mooncake
Hi everyone! Woops, it has been awhile. Work has gotten so so busy I simply cannot find to finish all the work I am meant to do. 90% of the time I feel like lying down on my office floor to do this –> ![]() . I don’t think it is quite appropriate so I have refrained myself from doing so. On the up-side, Nelson is back to it’s sunny warm days so I have started walking/biking to work again. This of course means that Spring is definitely here again. Ah, the birds are chirping, Sakura trees are blossoming and mooncakes start to appear in the Chinese shops signifying that Mid-Autumn Festival is just round the corner.
. I don’t think it is quite appropriate so I have refrained myself from doing so. On the up-side, Nelson is back to it’s sunny warm days so I have started walking/biking to work again. This of course means that Spring is definitely here again. Ah, the birds are chirping, Sakura trees are blossoming and mooncakes start to appear in the Chinese shops signifying that Mid-Autumn Festival is just round the corner.
I love love love mooncakes especially the snowskin types. But they are terribly expensive here with a very poor dough to filling ratio. I have been making my own for the last couple of years including the lotus paste! Making your own paste is terribly time consuming. So this year I smartened up and bought pre-made paste since I knew I would not have the time to make my own. Thank goodness I had the foresight otherwise I would not have been able to have mooncakes this year! You can get really creative with the fillings (chocolate, durian, custard etc) but I stuck with the traditional red bean and lotus paste fillings. Another thing you will need is a mold which is pretty easy to get nowadays. Just Google it. If you don’t have one no matter! Just make a round ball and voila. It may look oddly similar to mochi but it is the taste that counts right?


- 110g Icing Sugar
- 140g Cooked Glutinous Rice Flour (leave excess for dusting)
- 35g Shortening (Kremelta/Crisco)
- 190ml Water
- Ready made Lotus paste/Red bean paste
- Gel food colouring of your choice (optional)
- Roll out ready made paste into little balls weighing 20g each. Set aside.
- Mix sugar and flour together.
- Add shortening and water. Knead till smooth.
- If you are going to colour the dough, divide the dough. Add a pea size amount of food colouring and knead till colour is evenly distributed.
- Roll out the dough into balls weighing 20g each.
- Flatten the dough balls with your hand, place a ball of filling in the center, and seal.
- Dust the ball with flour and press into mooncake mold.
- Release from mold. Repeat until all balls are used.
- Chill for 1 hour, serve.
- If you prefer more filling, use 20g filling and 15g dough instead. It will be a bit harder to work with as you have to be gentle in sealing it to prevent tears.
Chinese, Cooking 101, Easy, Mid autumn, Mooncake, Thermomix, Tradition
